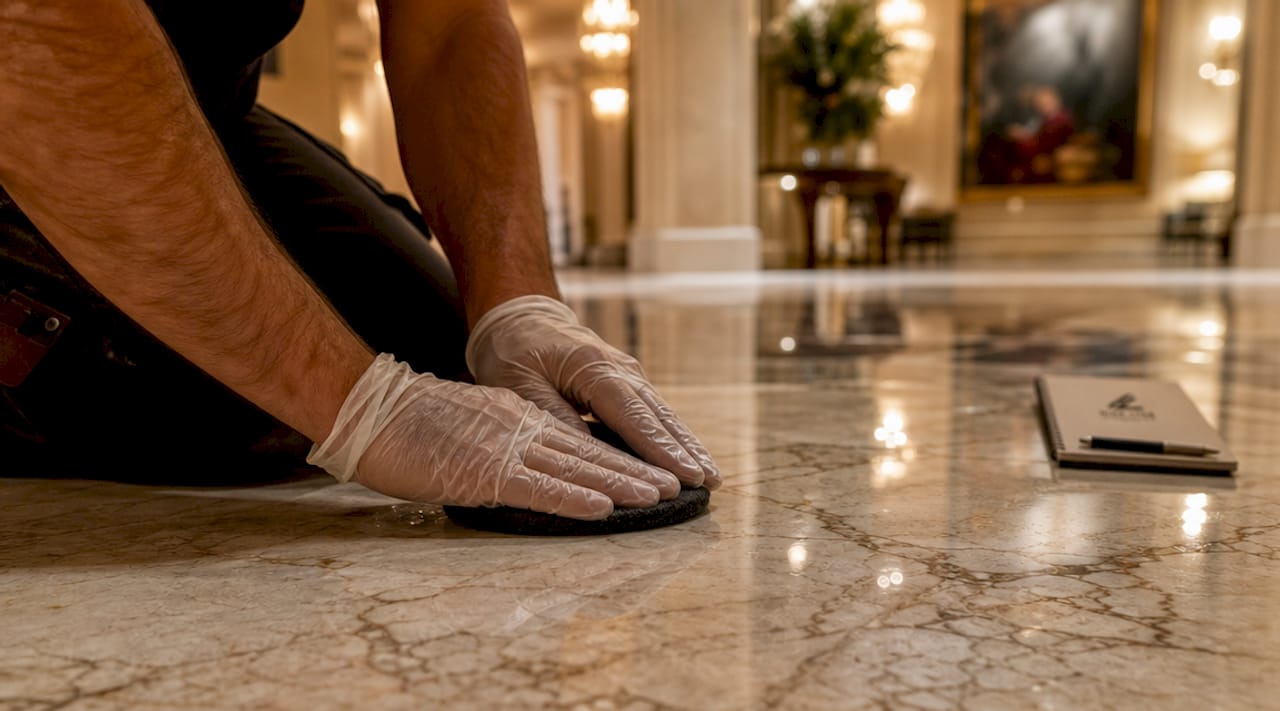
Stone polishing is defined as the progressive refinement of a surface through increasingly fine abrasives until microscopic scratches fall below the wavelength of visible light, producing a reflective, luminous finish. The role of polishing in stone care extends far beyond aesthetics. It reduces surface porosity, slows wear, and prepares stone for protective sealing. Tools like diamond abrasive pads and oxalic acid polishing compounds are standard in professional work on marble, granite, and quartzite. For homeowners and property managers, understanding this process means the difference between a floor that looks tired after two years and one that holds its finish for decades.
How does polishing improve stone appearance and durability?
Stone polishing produces gloss by reducing scratch depth below the 400 to 700 nanometer range of visible light wavelengths. When scratches exceed that threshold, light scatters in multiple directions and the surface looks dull or hazy. Once scratches fall below it, light reflects uniformly and the stone appears bright and clear. This is a physical transformation of the surface, not a coating applied on top.
The finish level achieved depends entirely on where the polishing sequence stops. Professional stone polishing follows a grit progression from coarse grits around 50 up through 3000 or higher, with each stage removing the scratch pattern left by the previous one. Stopping at 400 grit produces a honed, matte finish. Stopping at 800 grit yields a semi-polished look. Reaching 1500 to 3000 grit delivers the mirror finish most homeowners associate with premium marble countertops and floors.
Polishing also has a measurable effect on durability. Smoother surfaces reduce micro-scratches and friction caused by foot traffic and grit tracked in from outdoors, which directly slows surface wear. A well-polished floor resists daily abrasion far longer than a neglected one. This means fewer restoration cycles over the life of the stone.
For marble specifically, polishing delivers an additional chemical benefit. Oxalic acid compounds react with the calcium in marble to produce a calcium oxalate layer at the surface. This layer is harder and more reflective than the raw stone, which is why marble polished with the right compounds achieves a depth and clarity that mechanical abrasion alone cannot fully replicate.
Key finish distinctions to understand:
- Honed: Matte to satin appearance, achieved by stopping around 400 grit. Hides scratches well but shows etching more easily on marble.
- Semi-polished: A low sheen finish, typically 800 grit. Good balance of practicality and appearance for moderate-traffic areas.
- Full polish: High gloss, 1500 grit and above. Maximum light reflection and color depth, but requires consistent maintenance.
- Polished with chemical compounds: Used on calcite-based stones like marble and limestone for enhanced color transparency and gloss.
Pro Tip: If you are unsure what finish your stone currently has, hold a flashlight at a low angle to the surface in a dark room. Honed stone will show almost no reflection. A polished surface will reflect the light beam clearly.
What are the practical stone polishing methods and sequences?
The polishing process follows a structured sequence that cannot be shortcut without visible consequences. Skipping grits or rushing through stages causes haziness or ghosting defects that appear under raking light, a common result of amateur polishing. Each grit must fully remove the scratch pattern from the previous stage before moving forward.
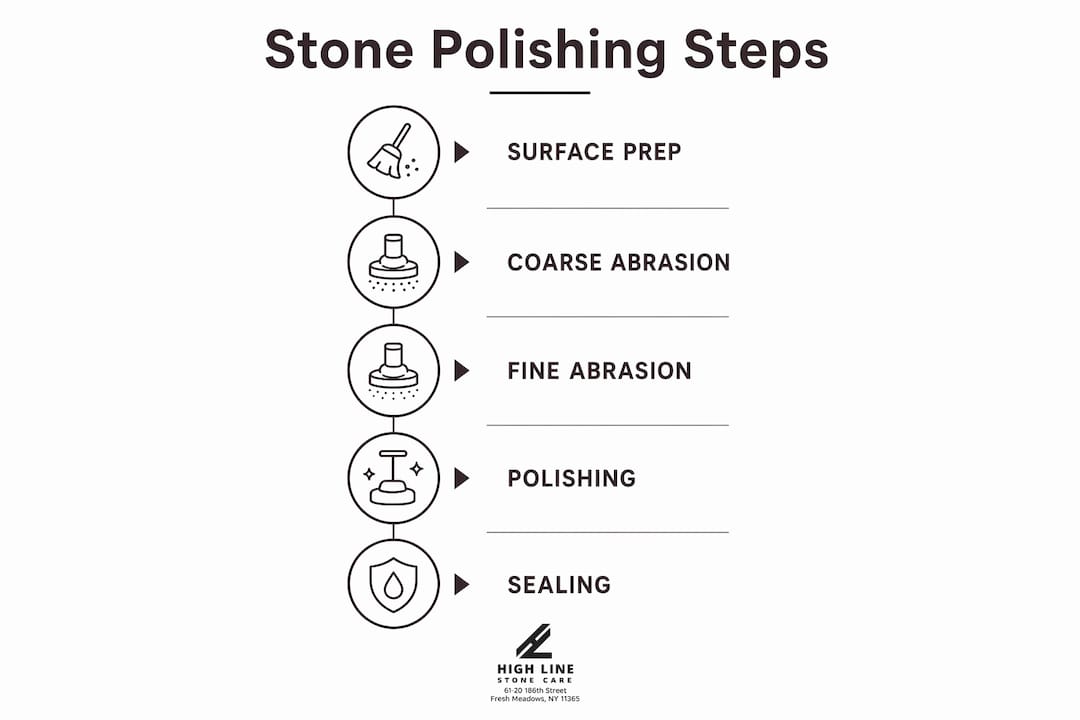
A standard professional sequence for marble or granite floors runs as follows:
- Assess the surface. Identify scratches, etching, or dull patches before selecting a starting grit. Deep scratches require starting at 50 or 100 grit. Light surface dullness may only need 400 grit to begin.
- Coarse grinding (50 to 200 grit). Remove deep scratches, lippage, or staining. Use a planetary grinder or angle grinder with diamond pads. Keep the surface wet throughout.
- Medium honing (400 grit). Refine the scratch pattern from the coarse stage. The surface should begin to look uniform and slightly satin at this point.
- Fine honing (800 grit). Remove the 400 grit pattern. The surface now has a consistent low sheen with no visible scratches under normal light.
- Pre-polish (1500 grit). The surface begins to show reflectivity. Verify uniformity by checking under a raking light source before proceeding.
- Polish (3000 grit and polishing compound). Apply the appropriate compound for the stone type. For marble, use an oxalic acid compound. For granite, use a tin oxide or diamond polishing powder.
- Inspect and seal. Check for swirl marks or uneven areas, then seal within 24 hours.
Different stone types require tailored approaches because hardness and mineral content vary significantly. Granite, rated 6 to 7 on the Mohs scale, polishes reliably with standard diamond pad sequences and requires no chemical compounds. Marble, rated 3 to 4, is softer and more reactive, so it benefits from chemical polishing compounds and gentler mechanical pressure. Quartzite sits between the two and generally follows granite protocols, though its variable mineral content means testing a small area first is advisable.
Water management during polishing is a detail many homeowners overlook. Optimal water flow is a steady light mist or drip that keeps the surface wet without flooding it. Too much water dilutes the polishing slurry and reduces pad effectiveness. Too little causes the pad to overheat, which can micro-crack the stone surface or glaze the pad.
| Stone Type | Polishing Method | Key Consideration |
|---|---|---|
| Marble | Diamond pads + oxalic acid compound | Soft and reactive; use lighter pressure and chemical compounds |
| Granite | Diamond pads + tin oxide or diamond powder | Hard and durable; standard grit sequence works reliably |
| Quartzite | Diamond pads, follow granite protocol | Test a small area first due to variable mineral content |
| Limestone | Diamond pads + chemical compounds | Similar to marble; highly sensitive to acid-related surface damage |
Pro Tip: Before sealing after polishing, confirm the surface is completely dry. Moisture trapped under an impregnating sealer causes white hazing that requires re-polishing to correct.
What are the benefits and risks of routine stone polishing maintenance?
The role of routine stone polishing is protective as much as cosmetic. Proper polishing followed by sealing significantly reduces the frequency and cost of future restoration. A marble floor that receives professional polishing every one to three years, depending on traffic, will not require the aggressive grinding and leveling that a neglected floor eventually demands. That distinction translates directly into cost savings for homeowners and property managers.
Benefits of maintaining a regular polishing schedule include:
- Slower surface wear. A polished surface has less friction, so foot traffic and grit cause less damage over time.
- Easier daily cleaning. Smooth, sealed stone repels spills and does not trap dirt in micro-pores the way a worn surface does.
- Lower long-term restoration costs. Preventive polishing costs a fraction of full restoration after years of neglect.
- Preserved property value. Premium stone floors and countertops are a significant investment. Maintaining their finish protects the monetary and aesthetic value of the property.
Risks of skipping or mishandling the process are equally concrete. Polishing without sealing afterward leaves the stone temporarily more porous and vulnerable to staining. Applying the wrong compound to a sensitive stone like marble can cause chemical etching. Using too coarse a starting grit on a lightly worn surface removes more material than necessary and shortens the stone’s lifespan over repeated cycles.
Frequency recommendations vary by location and use. High-traffic marble floors in lobbies or kitchens benefit from professional polishing every 12 to 18 months. Lower-traffic areas like bathroom floors or bedroom feature walls may only need attention every two to three years. Countertops used daily for food preparation typically need resealing every 6 to 12 months, even if the polish itself holds longer.
How does sealing complement polishing in stone care?
Sealing is the necessary second step after polishing, and its timing matters more than most homeowners realize. Polishing temporarily increases pore openness in the stone surface, making it more vulnerable to staining immediately after the process. Sealing within 24 hours closes that window of vulnerability and locks in the finish.
The relationship between polishing and sealing in stone care works as follows:
- Polishing opens the surface. The abrasion process clears debris and micro-particles from pores, which improves sealer penetration but also increases short-term stain risk.
- Impregnating sealers penetrate below the surface. Unlike topical coatings, quality impregnating sealers soak into the stone and cure within the pore structure, providing protection without altering the polished appearance.
- Surface must be dry before sealing. Moisture present under a sealer causes white hazing, which requires re-polishing to remove. Allow at least 24 hours of drying time in humid conditions.
- Resealing frequency depends on traffic and location. Resealing is typically needed every 6 to 12 months for high-use surfaces. A simple water bead test confirms when the sealer has worn: if water absorbs into the stone rather than beading on the surface, it is time to reseal.
For homeowners seeking long-term protection, advanced sealers like Highlinestonecare’s Opal Luxury Anti-Acid Sealer go beyond standard impregnating formulas. This sealer provides permanent protection against etching and staining, which is particularly valuable for marble surfaces near kitchen sinks or dining areas where acid-related surface damage from citrus, wine, or cleaning products is a recurring concern. Pairing a thorough polish with the right stone sealing service produces results that standard maintenance alone cannot achieve.
Outdoor stone surfaces present additional sealing considerations. Exposure to rain, freeze-thaw cycles, and UV light accelerates sealer degradation, so exterior stone typically requires more frequent resealing. Resources on surface sealing for outdoor stone can help property managers plan appropriate maintenance schedules for patios, steps, and exterior cladding.
Key takeaways
Polishing and sealing together form the foundation of effective stone care, and skipping either step compromises the durability and appearance of the surface.
| Point | Details |
|---|---|
| Polishing is surface refinement, not coating | Abrasion reduces scratch depth below visible light wavelengths to produce genuine gloss. |
| Grit sequence cannot be skipped | Each stage must remove the previous scratch pattern; rushing causes haziness and defects. |
| Stone type determines method | Marble needs chemical compounds; granite follows standard diamond pad sequences. |
| Seal within 24 hours of polishing | Polishing opens pores temporarily, making timely sealing critical to prevent staining. |
| Routine polishing reduces long-term costs | Regular maintenance prevents the aggressive restoration that neglected stone eventually requires. |
What I’ve learned from years of watching stone surfaces age
Most homeowners treat polishing as a cosmetic fix, something done before a sale or after a visible scratch appears. That framing is the single most expensive mistake in stone care. Polishing is structural maintenance. It removes the micro-damage that accumulates invisibly with every footstep and every cleaning cycle, and it prepares the surface to accept a sealer that actually works.
The clients who call for full restoration work almost always have one thing in common: they waited. They saw the surface lose its sheen gradually, assumed it was normal aging, and did nothing until the stone looked genuinely worn. By that point, the job requires aggressive grinding, significant material removal, and multiple polishing stages. The cost is three to five times what consistent maintenance would have been.
I also see a persistent misconception that DIY polishing kits deliver professional results. Some surface-level work is manageable at home, particularly light honing with 800 grit pads on a small countertop. But professional stone polishing involves equipment, technique, and material knowledge that takes years to develop. Swirl marks, uneven grit transitions, and improper sealing are the most common outcomes of well-intentioned DIY attempts on floors and large surfaces. The stone does not forgive those errors easily.
The guide to stone honing and polishing that actually serves homeowners well is simple: schedule maintenance before you see a problem, not after. Treat your stone the way you treat a car. You do not wait for the engine to fail before changing the oil.
— High
Professional stone polishing services for your home
Highlinestonecare provides advanced stone polishing and restoration services for homeowners and property managers across New York City, Manhattan, and surrounding areas. Whether your marble floors have lost their sheen or your granite countertops show years of micro-scratching, the team at Highlinestonecare applies a precise, grit-by-grit polishing sequence followed by professional-grade sealing to restore and protect your surfaces. The Opal Luxury Anti-Acid Sealer, exclusive to Highlinestonecare, delivers permanent protection against etching and staining with a single application. Explore marble restoration and care options or visit Highlinestonecare to schedule a consultation and protect your investment today.
FAQ
What is stone honing and how does it differ from polishing?
Stone honing is the process of smoothing a surface to a matte or satin finish using abrasives that stop before the final high-gloss stage. Polishing continues the grit sequence beyond honing to achieve a reflective, mirror-like finish by reducing scratch depth below the wavelength of visible light.
How often should stone floors be polished?
High-traffic marble or granite floors benefit from professional polishing every 12 to 18 months. Lower-traffic areas may only need attention every two to three years, depending on wear and the condition of the existing sealer.
Why is sealing necessary after polishing?
Polishing temporarily increases the openness of stone pores, which raises the risk of staining immediately after the process. Sealing within 24 hours closes that vulnerability and protects the finish from moisture, oils, and acid-related surface damage.
Can I polish stone floors myself?
Light honing on small surfaces is manageable with the right diamond pads and technique. However, professional stone polishing is strongly recommended for floors and large areas, since skipping grit stages or mismanaging water causes defects like swirl marks and ghosting that are difficult to correct without re-grinding.
What is the role of honing in stone care compared to full polishing?
Honing removes surface scratches and restores uniformity without achieving high gloss, making it ideal for surfaces where a matte finish is preferred or where the stone has light damage. Full polishing builds on honing to deliver maximum reflectivity and color depth, and it requires a complete grit sequence from coarse through fine abrasives.
Recommended
- NYC Stone Care Guide: Expert Steps for Long-Lasting Surfaces
- Marble polishing Suffolk County | Shine and restore – Highline Stone Care
- Commercial & Residential Stone Polishing Manhattan NY
- Stone Polishing NYC | Countertop & Floor Polishing Services