
Stone surface dullness is the loss of a stone’s original reflectivity caused by one of three distinct conditions: residue film buildup, chemical etching, or mechanical wear. Identifying the correct cause matters because a cleaner can remove residue but cannot repair etched or physically worn stone.
Run this two-step diagnostic first:
- Wet-vs-dry shine test: Dampen a small section with plain water. If the stone looks glossy when wet but loses its shine as it dries, the surface has micro-scratches or worn polish — cleaning alone will not restore it. If it stays dull even when wet, residue or a coating film is the more likely culprit.
- Water-bead test: Drop a few beads of water on a dry area. If they bead up, the sealer is still working. If the water soaks in or darkens the stone, the sealer has failed and resealing is likely needed.
What to do next, based on what you find:
- Residue film (dull when wet and dry) → clean with a pH-neutral stone cleaner, rinse thoroughly, and dry with a microfiber cloth.
- Etching or wear (glossy when wet, dull when dry) → stop using any acidic or abrasive products and arrange a professional evaluation.
- Sealer failure (water soaks in) → reseal after cleaning, or have a professional assess the surface condition first.
Table of Contents
- What does dull stone actually look like?
- What causes stone surfaces to go dull?
- How do you diagnose which cause is responsible?
- Treating dullness based on how severe it is
- A practical remediation sequence to follow
- Common mistakes that make dullness worse
- How to keep stone from going dull again
- What cleaning can fix and what it cannot
- When should you call a professional?
- Key Takeaways
- The part most homeowners get wrong
- Highlinestonecare restores and protects your stone surfaces
- Useful resources for further reading
What does dull stone actually look like?
Dullness on natural stone rarely looks the same from one surface to the next. On polished marble or limestone, it typically appears as a cloudy or hazy film across the surface, or as distinct traffic lanes where foot traffic has worn the finish unevenly. On countertops, you may notice a ring near the sink, a dull patch where a cutting board sits, or an area that looks clean but lacks the clarity and depth the stone once had.
Tactile clues are just as telling as visual ones. Run your hand across the surface: a properly polished stone feels smooth and almost glassy. A worn or etched surface may feel slightly rough or uneven in spots, even after cleaning.
Inspection checklist: Focus your initial assessment on the highest-risk zones — entry points and hallways (foot traffic and grit), kitchen paths and countertops near the sink (acid exposure), bathroom vanities (soap and product residue), and grout lines (trapped moisture and cleaning product buildup). Photograph each area in natural light before and after any cleaning attempt. Those images are the single most useful thing you can hand a restoration technician.
Pro Tip:Take your before photos at a low angle with a single light source (a lamp or window light raking across the surface). This side-lighting reveals micro-scratches and haze that overhead lighting completely hides.
What causes stone surfaces to go dull?
Stone surface dullness is typically a symptom of one of three distinct conditions, and each one demands a different response.
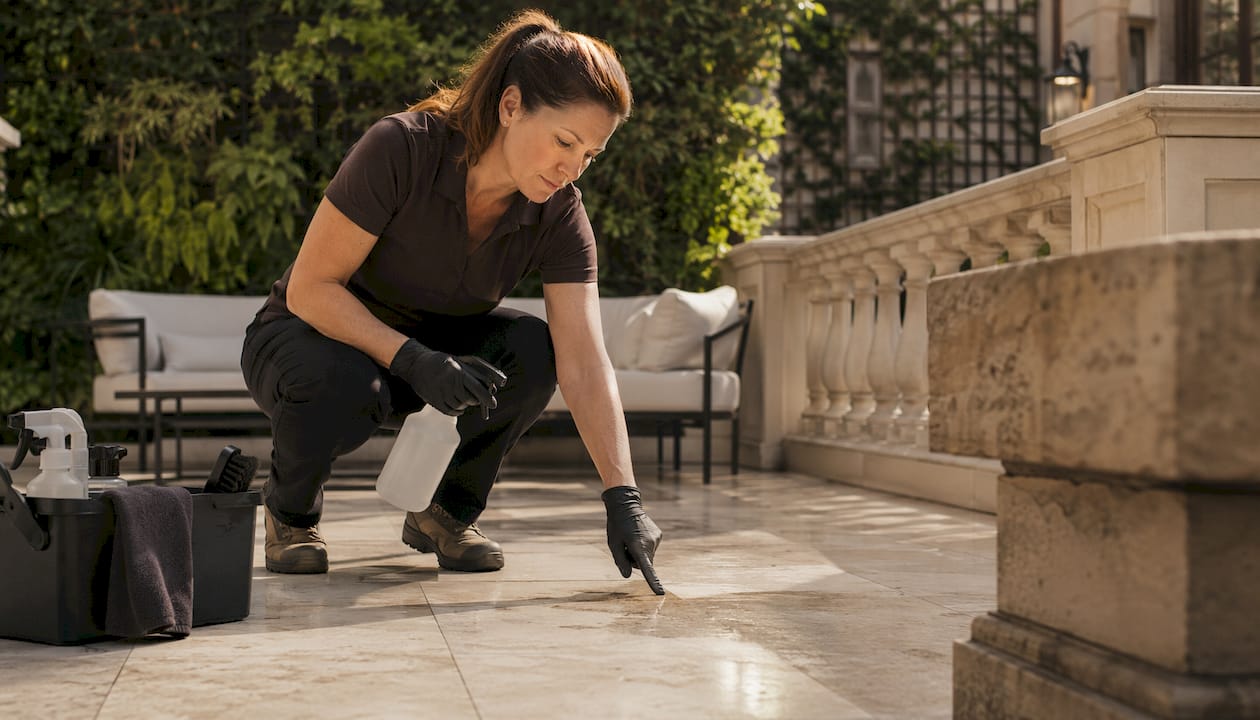
Residue film is the most common and most fixable cause. No-rinse floor cleaners, excess dish soap, oil-based “shine” products, and layered grime all deposit a film on the surface that scatters light rather than reflecting it. The result is a streaky, hazy appearance that can look like serious damage but often cleans up with the right product and technique.
Chemical etching is a different problem entirely. Marble, limestone, and travertine are calcium-based stones, and when acids contact them — lemon juice, wine, vinegar, coffee, even some household cleaners — a chemical reaction permanently alters the surface finish, leaving cloudy or lightened spots. Critically, sealers do not prevent etching. They protect against staining (absorbed liquids), but an acid sitting on the surface will etch through a sealed stone just as readily as an unsealed one. Etched spots cannot be cleaned away.
Mechanical wear develops gradually. Grit and sand tracked in from outside act like fine-grit sandpaper underfoot, creating microscopic scratches across the polished layer. Over time, these micro-scratches accumulate into visible traffic lanes that reduce reflectivity across entire sections of a floor. Restoring this type of dullness requires mechanical honing, not cleaning.
Two secondary contributors are worth noting:
- Sealer and coating failure: When an impregnating sealer breaks down, the stone becomes more porous and absorbs spills more readily, accelerating staining and the appearance of dullness.
- Topical waxes and polymer coatings: These wear unevenly, trap contaminants beneath the surface, and create a cloudy haze that is often mistaken for worn stone.
Pro Tip:Granite is far more acid-resistant than marble or limestone, but it still dulls from residue and mechanical wear. Do not assume a harder stone is immune — it just has a longer timeline before problems appear.
How do you diagnose which cause is responsible?
Accurate diagnosis prevents the most common and costly homeowner mistake: applying the wrong treatment. These tests are safe, require no special tools, and take less than ten minutes.
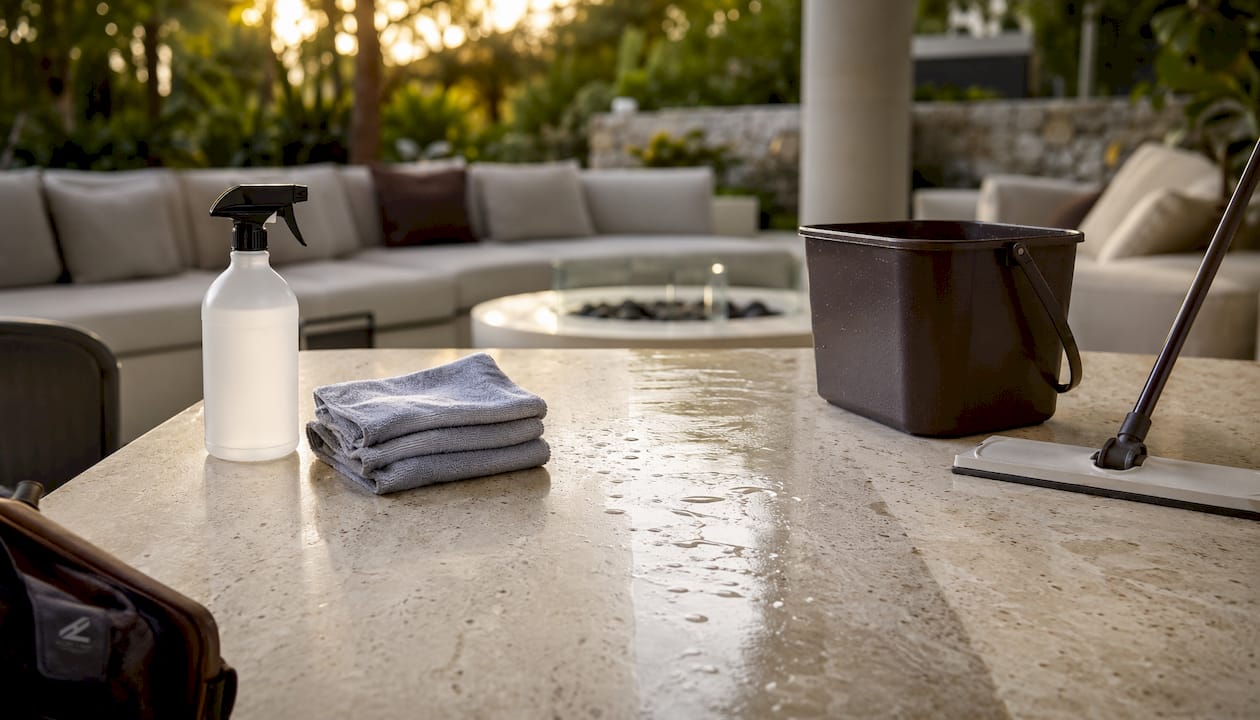
- Wet-vs-dry shine test. Dampen a 12-inch section with plain water and observe. Glossy when wet, dull when dry = physical micro-scratching or worn finish. Still dull when wet = residue film or a coating issue. This single test separates the two most common causes.
- Water-bead test. On a clean, dry area, place five or six drops of water and wait 30 seconds. Beading indicates the sealer is performing. Immediate absorption or darkening of the stone indicates sealer failure.
- Spot-clean patch test. Apply a small amount of pH-neutral stone cleaner to a dull area, work it gently with a soft cloth, rinse with clean water, and dry. If the area brightens noticeably, residue was the cause. If it looks identical after cleaning, the problem is etching or wear.
- Magnifier or raking-light check. Hold a flashlight at a low angle across the surface in a darkened room. Micro-scratches will appear as a fine network of lines. Etch marks appear as lighter, slightly rough patches with no directional pattern.
- Etching vs. staining check. Etching appears lighter or cloudier than the surrounding stone; staining appears darker. The two require fundamentally different fixes, so confirming which you have before treating is worth the extra minute.
Safety boundaries: Never apply vinegar, lemon juice, or any acid-based cleaner as a “test.” Do not use abrasive scrubbing pads during diagnosis. If the wet test confirms wear or etching, stop all DIY treatment and contact a credentialed stone-care technician. Attempting to buff out etching without professional equipment typically deepens the damage.
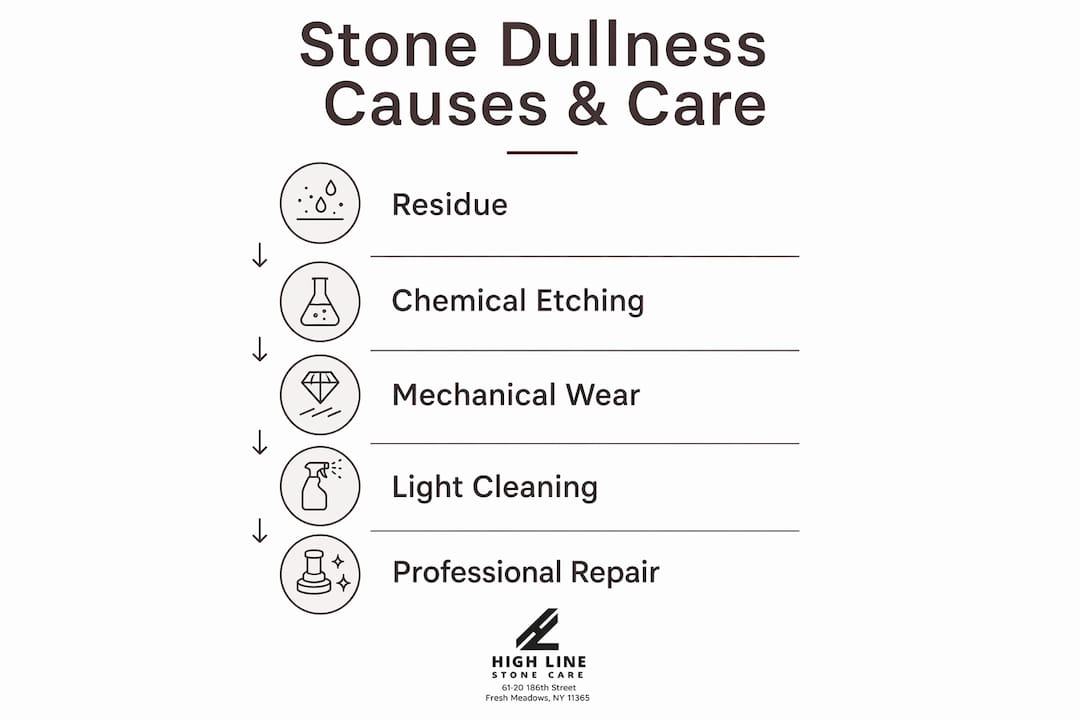
Treating dullness based on how severe it is
Matching the treatment to the severity level is what separates a successful restoration from an expensive mistake.
| Severity | Cause | Recommended treatment | DIY or pro? |
|---|---|---|---|
| Light | Residue film, soap buildup | pH-neutral cleaner, thorough rinse, microfiber dry | DIY |
| Moderate | Patchy sealer, light surface scratches | Strip coatings, reseal, or professional powder polish | Often pro |
| Severe | Etching, worn-through polish, deep traffic lanes | Mechanical honing, diamond resurfacing, professional polishing | Pro required |
Light dullness responds well to a proper cleaning routine. Use a pH-neutral stone cleaner diluted according to the label, mop or wipe in sections, rinse with clean water (this step is skipped far too often), and dry immediately with a microfiber cloth. Repeat weekly for high-traffic areas.
Moderate dullness usually means the sealer has degraded or a topical coating has worn unevenly. Stripping old coatings and applying a fresh impregnating sealer can restore clarity in some cases. Light surface scratches may respond to professional powder polishing, where a technician applies a polishing compound and works it with a low-speed machine. This is rarely a true DIY task.
Severe dullness from etching or a worn polished layer cannot be cleaned away. Professional polishing uses progressive abrasives and diamond pads to remove the damaged surface layer and restore true reflectivity. For large etch areas or deep traffic-lane wear, diamond resurfacing is often the only path to a lasting result.
A word on “shine” products: Topical waxes and spray-on shine boosters deposit a film that looks good for a few days, then wears unevenly and traps dirt. They do not restore the stone’s finish — they mask it temporarily while making future professional restoration harder and more expensive. Avoid them entirely.
Pro Tip:If you are waiting for a professional appointment and need a temporary improvement, a single pass with a pH-neutral cleaner and a thorough rinse will at least remove surface residue without causing additional damage. That is the only safe interim step for etched or worn stone.
A practical remediation sequence to follow
Working through these steps in order prevents the most common errors and gives a restoration technician the clearest possible picture if professional help is needed.
- Document the surface. Photograph every dull area in raking light before touching anything. Note the stone type, approximate age, and what cleaners have been used recently.
- Run the wet-vs-dry and water-bead tests. Record what you observe. This takes five minutes and determines whether you proceed with DIY cleaning or stop and call a pro.
- Patch-test your cleaner. Apply pH-neutral stone cleaner to a small, inconspicuous area. Wait the dwell time on the label (usually 2–3 minutes), wipe, rinse, and dry. Check for any color change, streaking, or texture change before proceeding to the full surface.
- Clean the full surface (if residue is confirmed). Work in manageable sections, rinse each section with clean water before moving to the next, and dry with a clean microfiber cloth. Do not let the cleaner dry on the surface.
- Assess and protect. After cleaning and drying, repeat the water-bead test. If water still soaks in, apply an impregnating sealer appropriate for your stone type. If the surface is still dull after correct cleaning, schedule a professional evaluation rather than escalating DIY efforts.
Materials you need: pH-neutral stone cleaner (products labeled specifically for natural stone), clean microfiber cloths or mop heads, a soft-bristle brush for grout lines, and an impregnating sealer if the water-bead test indicates failure.
Pro Tip:Use two buckets when mopping stone floors — one for the cleaning solution and one for rinse water. Mopping with dirty rinse water is one of the most common ways residue film builds up over time.
Common mistakes that make dullness worse
Some of the most well-intentioned homeowner fixes cause more damage than the original problem. Knowing what not to do is as useful as knowing the correct treatment.
- Vinegar, lemon juice, and acid-based cleaners. These are among the most frequently recommended “natural” cleaners online and among the most damaging to marble, limestone, and travertine. A single application can etch the surface and leave permanent dull marks.
- Abrasive scouring pads and steel wool. These create the very micro-scratches that cause mechanical wear. Even a “soft” scrubbing pad can damage a polished finish.
- Floor-cleaning machines with improper pads. A rotary machine with the wrong pad type can strip sealer, create swirl marks, and accelerate uneven wear across large areas.
- Store-bought wax and shine products. As noted above, these deposit films that trap dirt, wear unevenly, and complicate professional restoration. They are a short-term cosmetic fix with long-term consequences.
- Skipping the rinse step. Leaving even a pH-neutral cleaner on the surface to dry deposits a residue film — the very problem you were trying to remove.
For a more complete list of damaging DIY approaches and what to do instead, Highlinestonecare has published detailed guidance for homeowners. When damage from these mistakes is caught early, a professional can often reverse it through polishing. Deep etching or widespread wear from repeated abrasive use typically requires full mechanical restoration.
How to keep stone from going dull again
Prevention is considerably less expensive than restoration. A consistent routine addresses all three root causes before they become visible problems.
Daily and weekly habits:
- Clean with a pH-neutral stone cleaner every time. Never substitute all-purpose household cleaners, dish soap in excess, or anything labeled “antibacterial” or “multi-surface.”
- Use soft microfiber mops and cloths exclusively. Cotton string mops leave residue; abrasive pads scratch.
- Dry the surface after mopping or wiping. Standing water accelerates sealer breakdown and leaves mineral deposits.
- Wipe up spills immediately, especially anything acidic. Wine, coffee, citrus, and vinegar can etch marble in minutes.
Entry and traffic controls:
- Place absorbent mats at all exterior entry points to trap grit before it reaches stone floors.
- Add felt pads under all furniture legs. A chair dragged across polished marble without felt pads creates visible scratches quickly.
- Vacuum or dry-sweep before mopping to remove loose grit that would otherwise be ground into the surface.
Sealing intervals:
Run the water-bead test every six months on kitchen and bathroom stone, and annually on lower-traffic areas. When water no longer beads, it is time to reseal. High-traffic commercial floors and kitchen countertops near cooking areas may need attention more frequently. For detailed stone countertop protection guidance, Highlinestonecare’s countertop guide covers sealing schedules and product selection by stone type.
Pro Tip:Keep a small spray bottle of diluted pH-neutral stone cleaner and a dedicated microfiber cloth near the kitchen sink. Immediate spill response — especially for wine, lemon, and coffee — is the single most effective way to prevent etch marks on marble countertops.
What cleaning can fix and what it cannot
Industry guidance is consistent on this point: cleaning addresses residue, not structural surface damage. Etching is a chemical alteration of the stone’s surface; mechanical wear is a physical removal of the polished layer. Neither responds to cleaning products, regardless of how strong or specialized they are.
The core principle: Maintenance and restoration are different disciplines. Routine pH-neutral cleaning preserves a finish that is still intact. Honing and polishing are required when the polished layer is gone or when etching has occurred. Applying a cleaner to an etched surface does not restore the finish — it cleans an already-damaged surface.
This distinction has direct cost implications. A proper cleaning session is a routine maintenance expense. Professional honing and polishing to address etching or worn traffic lanes is a restoration service, and the scope and cost depend on the extent of the damage, the stone type, and the finish level being restored. Diamond resurfacing for severely worn floors represents the most involved intervention, typically reserved for surfaces where the polished layer has been substantially removed.
| Treatment type | Appropriate for | Typical approach |
|---|---|---|
| DIY pH-neutral cleaning | Residue film, routine maintenance | Homeowner, weekly or as needed |
| Professional sealing | Sealer failure confirmed by water-bead test | Stone care technician, every 1–3 years |
| Professional polishing | Light etching, moderate wear, uneven finish | Credentialed restoration technician |
| Diamond honing/resurfacing | Deep etching, heavy traffic-lane wear, lost polish | Specialist restoration company |
For a deeper look at why marble loses its shine specifically, Highlinestonecare’s resource covers the progression from early dullness to full finish loss.
When should you call a professional?
Some conditions are simply beyond what any homeowner product or technique can address. Recognizing these signals early prevents further damage and keeps restoration costs lower.
Call a professional when you observe:
- Persistent dullness after correct pH-neutral cleaning and rinsing, with no improvement
- Visible etch marks (lighter, slightly rough patches) that do not change when the surface is wetted
- Deep scratches or clearly worn traffic lanes where the polished finish is visibly gone
- Widespread haze across a large floor area that the wet test confirms is wear, not residue
- Stains that have soaked into the stone and darkened over time despite surface cleaning
What a credentialed restoration technician does:
Professionals use graded mechanical abrasives, including diamond pads and polishing powders, to remove the damaged surface layer progressively and restore true reflectivity. For etched marble or limestone, this process levels the surface and rebuilds the polish from the stone itself rather than applying a topical coating. Post-restoration, a specialist will apply a protection product appropriate for the stone type and use case. For high-risk surfaces, Highlinestonecare’s Opal Luxury Anti Acid Sealer provides advanced defense against acid-related surface damage from wine, lemon, vinegar, and coffee.
Questions to ask before hiring:
- What is the full scope of work, and will you document the surface condition before starting?
- Which abrasive grades and polishing compounds will you use for this stone type?
- Do you provide before-and-after photographs?
- What warranty or satisfaction guarantee applies to the work?
Pro Tip:A reputable stone restoration company will always inspect the surface in person before quoting. Be cautious of any bid given sight-unseen or based solely on square footage without a condition assessment.
Key Takeaways
Stone surface dullness requires accurate diagnosis first: residue cleans away, but etching and mechanical wear require professional mechanical restoration that no cleaner can replicate.
| Point | Details |
|---|---|
| Run the wet-vs-dry test first | Glossy when wet but dull when dry means wear or etching — cleaning will not fix it. |
| Water-bead test confirms sealer status | Water soaking in rather than beading means the sealer has failed and resealing is needed. |
| Match treatment to cause | Residue responds to pH-neutral cleaning; etching and worn polish require professional honing or diamond resurfacing. |
| Prevention is the lowest-cost strategy | pH-neutral cleaners, entry mats, felt pads, and prompt spill response prevent most dullness from developing. |
| Highlinestonecare for restoration and protection | Highlinestonecare provides professional restoration services and the Opal Luxury Anti Acid Sealer for lasting surface protection in New York City. |
The part most homeowners get wrong
The most consistent pattern in stone surface damage is not neglect — it is well-intentioned intervention with the wrong product. Homeowners reach for what is under the sink: a multi-surface spray, a “natural” vinegar solution, or a shine-boosting wax they found at a hardware store. Each of these feels like a reasonable response to a dull surface. Each one makes the underlying problem harder and more expensive to fix.
The wet-vs-dry test is the most underused tool available to any homeowner. It takes 30 seconds and immediately separates a cleaning problem from a restoration problem. Yet most people skip it and go straight to scrubbing, which either does nothing (for etching and wear) or deposits another layer of residue on top of the existing film.
The practical advice worth keeping close: build a simple stone-care kit with a pH-neutral stone cleaner, two dedicated microfiber cloths (one for cleaning, one for drying), and a small spray bottle. Document your stone’s condition with photographs twice a year, in the same light and from the same angle. Those photos are worth more than any product when a technician needs to assess how quickly a surface is deteriorating. And when the wet test tells you the problem is wear or etching, the right move is to stop, protect the surface from further exposure, and call a professional. Waiting and experimenting with store products is the one decision that consistently turns a moderate restoration job into a major one.
Highlinestonecare restores and protects your stone surfaces
When cleaning has not resolved the dullness, or when you can see etch marks and worn traffic lanes that no product will touch, Highlinestonecare’s restoration team provides the mechanical expertise to bring the surface back properly. Every project begins with an in-person inspection and photographic documentation of the surface condition, followed by a clear scope and quote before any work begins. Services cover marble, limestone, travertine, granite, and terrazzo across residential, commercial, and luxury properties throughout New York City.
For surfaces at ongoing risk from acidic spills — kitchen countertops, bathroom vanities, dining areas — Highlinestonecare’s Opal Luxury Anti Acid Sealer provides advanced protection against wine, lemon, vinegar, and coffee damage that standard sealers cannot match. Applied post-restoration, it defends the finish at the surface level rather than simply slowing absorption. To schedule an inspection or request a quote, contact Highlinestonecare with your stone type, the affected area, and any photographs you have taken. That information allows the team to give you an accurate scope from the first conversation.
Useful resources for further reading
- Natural Stone Institute — The industry’s primary professional body for stone care standards, installer certification, and technical guidance on maintenance and restoration.
- Etching vs. staining on natural stone — A clear technical breakdown of how etching and staining differ, why they look similar, and why they require different treatments.
- Why does my stone floor look dull? — Covers the three primary causes of dullness with practical guidance on identifying each.
- How to restore dull, etched, or stained natural stone — Step-by-step restoration guidance including when professional intervention is required.
- Highlinestonecare: stone restoration and protection services — Service scope, process overview, and project examples for residential and commercial restoration in New York City.
- Opal Luxury Anti Acid Sealer product page — Technical details and application guidance for Highlinestonecare’s advanced anti-etch protection product.
- Signs your stone needs restoration — A homeowner-focused self-assessment guide for determining when professional restoration is the appropriate next step.
- Preventive home maintenance practices — General preventive-maintenance principles for homeowners that apply across interior surfaces, including seasonal inspection schedules.
Recommended
- Stone Surface Types Explained: A Complete 2026 Guide
- What Is Stone Surface Etching: A Homeowner’s Guide
- Honed vs Polished Stone Surfaces: What You Need to Know
- Stone care terms explained: Expert guide for NYC homes