Different stone polishing methods are defined as the set of techniques used to refine a stone surface from rough or dull to smooth and reflective, each suited to specific stone types and maintenance goals. The four primary approaches are wet polishing with diamond abrasive pads, chemical polishing using compounds like cerium oxide or oxalic acid, mechanical grinding through progressive grit sequences, and barrier coatings that protect the finished surface. Choosing the wrong method for your stone type can cause permanent damage, dull patches, or acid-related surface etching that requires full restoration. This guide breaks down each technique so homeowners and property managers can make informed decisions before touching a single surface.
1. Different stone polishing methods: an overview
Stone polishing is the science of progressive scratch refinement, where each finer grit erases the scratch pattern left by the previous one until the surface reflects light clearly. That definition matters because it explains why there is no single universal method. Each technique targets a different stage of that refinement process, or a different stone chemistry entirely.
The industry term for the full process is stone surface finishing, which encompasses grinding, honing, polishing, and sealing as distinct phases. Homeowners often use “polishing” to mean all of these combined. Understanding the distinction helps you identify which phase your surface actually needs, whether that is removing deep scratches, restoring gloss, or protecting an already polished surface.
Knowing your stone type before selecting any technique is non-negotiable. Recognizing whether a stone is calcite-based or silicate-based determines which compounds and abrasives are safe to use. Marble and limestone are calcite-based and react chemically to acids. Granite and quartzite are silicate-based and require different compounds entirely. Using the wrong approach on either type can ruin the finish permanently.
2. Wet polishing: the professional standard for natural stone
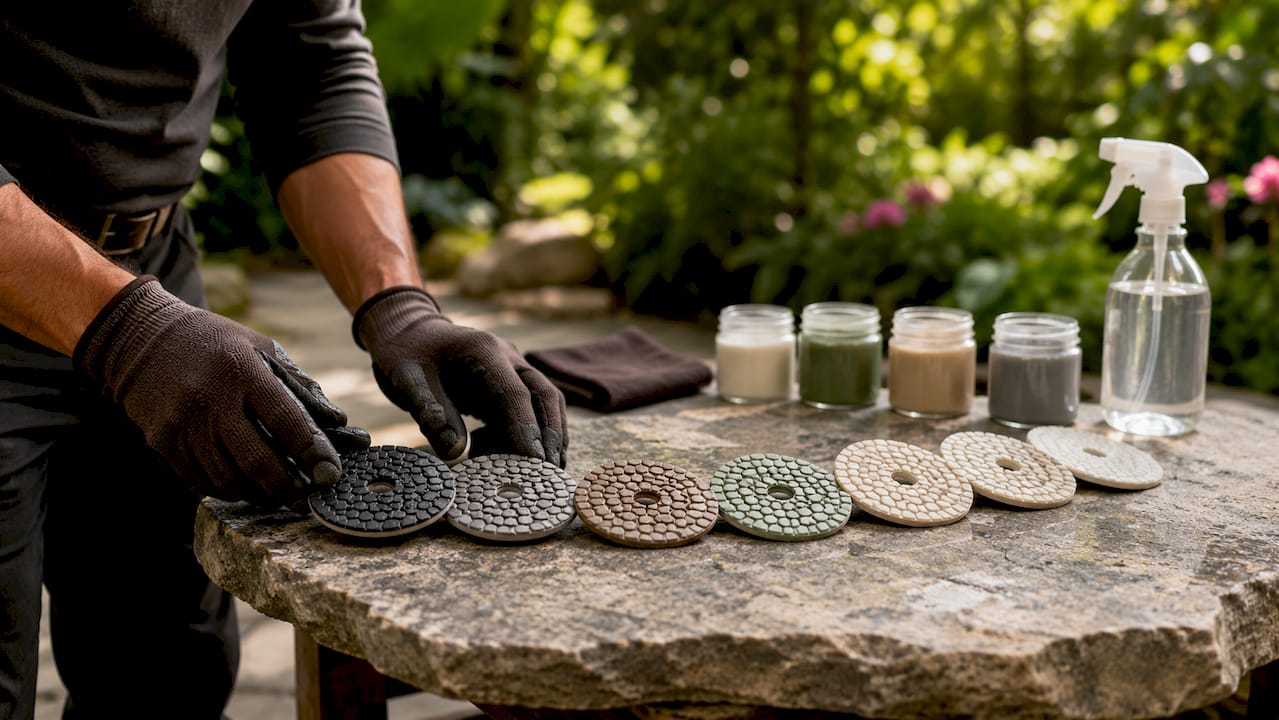
Wet polishing is the most widely used professional stone polishing technique for natural stone surfaces. It uses diamond abrasive pads with a continuous water supply to cool the pad, flush away slurry, and prevent heat buildup. Wet pads last 3–5 times longer than dry pads and produce superior finishes. That lifespan advantage directly reduces the cost per square foot for any polishing project.
Best stone types for wet polishing:
- Marble and travertine (calcite-based, heat-sensitive)
- Granite and quartzite (silicate-based, hard surfaces)
- Engineered stones with resin binders
- Limestone and onyx
The grit progression for wet polishing typically starts at 50 grit for heavy stock removal and advances through 100, 200, 400, 800, 1,500, and 3,000 grit before a final polishing compound is applied. Coarse grits run at 1,500–2,500 RPM, medium grits at 2,500–3,500 RPM, and fine grits at 3,000–4,500 RPM. Maintaining the correct RPM at each stage prevents burning and uneven finishes.
Water management is the most overlooked variable in wet polishing. Too little water causes heat buildup and pad glazing. Too much water dilutes the abrasive action and reduces cutting efficiency. A steady, controlled drip at the pad center is the professional standard.
Pro Tip: Keep consistent, light pressure throughout each grit pass. Heavy pressure does not speed up the process. It creates uneven scratch patterns that require you to go back to a coarser grit.
3. Chemical polishing: compounds, chemistry, and ideal stones
Chemical polishing, also called chemo-mechanical polishing, uses reactive compounds to create a reflective layer on the stone surface through a chemical interaction rather than purely mechanical abrasion. Cerium oxide works on silicate stones like granite and quartz, while oxalic acid is effective on calcite-based stones like marble. Each compound reacts with the stone’s mineral composition to produce a thin, highly reflective surface layer.
This method is particularly useful for homeowners dealing with minor etching or dull patches on marble countertops. Marble polishing powder applied with a damp cloth can address light surface etches without heavy machinery. Larger repairs, however, require professional equipment like planetary grinders.
Stones well-suited to chemical polishing:
- Marble (oxalic acid compounds)
- Limestone and calcite-based stones (oxalic acid)
- Granite and quartz (cerium oxide)
- Engineered quartz surfaces (cerium oxide with light abrasion)
Chemical polishing complements mechanical abrasion rather than replacing it. Professionals typically apply a chemical polishing compound as the final step after completing the mechanical grit sequence. The compound fills microscopic surface irregularities and enhances gloss depth beyond what abrasives alone can achieve. For homeowners, it is the most accessible DIY stone polishing tip for maintaining an already polished surface between professional visits.
4. Mechanical grinding and polishing sequences: grit progression
Mechanical polishing uses diamond tooling moving progressively from grinding to honing to polishing. Grinding uses coarse diamonds, honing uses mid-range grit, and polishing uses finer grit to achieve mirror gloss. Each phase has a distinct purpose and cannot be skipped without compromising the final result.
Standard grit sequence for natural stone finishing:
- 50 grit (grinding): Removes deep scratches, lippage, and surface irregularities
- 100 grit (grinding): Refines the coarse scratch pattern
- 200 grit (coarse honing): Begins transitioning from grinding to honing
- 400 grit (medium honing): Removes 200-grit scratches, surface becomes matte
- 800 grit (fine honing): Produces a honed finish suitable for floors
- 1,500 grit (pre-polish): Surface begins to show reflectivity
- 3,000 grit (polish): Near-mirror finish achieved before final compound
Hard silicate stones like granite require more aggressive coarse grits and slower progression because of their density. Soft calcite stones like marble respond faster but are more prone to heat damage and over-grinding. Adjusting pressure and RPM for each stone type is as important as the grit sequence itself.
Skipping grit steps causes coarse scratches to remain that finer pads cannot remove. This is the most common mistake among beginners and often requires restarting the entire sequence from the coarsest grit. The time lost far exceeds any time saved by skipping steps.
The raking light test is the professional quality check performed after every grit step. You hold a flashlight or work light at a low angle across the surface. If you see scratch patterns from the previous grit, you have not finished that step. Only when those scratches are gone should you advance to the next grit.
Pro Tip: For floors, stopping the sequence between 400 and 800 grit produces a honed finish that hides wear and provides better slip resistance than a high-gloss polish. This is the preferred finish for high-traffic residential and commercial floors.
5. Barrier coatings and surface sealers for stone protection
Barrier coatings and sealers are the final step in natural stone finishing, applied after polishing to protect the surface from staining, etching, and moisture penetration. Sealers improve stain resistance and durability and come in two primary categories: penetrating (impregnating) sealers and topical sealers. Each type serves a different purpose and suits different stone types and use scenarios.
Sealer types and their applications:
- Penetrating (impregnating) sealers: Absorb into the stone’s pores and repel liquids from within. They do not change the surface appearance. Best for granite, marble, and limestone countertops and floors.
- Topical sealers: Sit on the surface and create a physical barrier. They can enhance gloss or add a wet-look finish. Best for lower-traffic decorative surfaces.
- Anti-acid sealers: Provide chemical resistance against acid-related surface damage and etching. Critical for marble and calcite-based stones in kitchens and bathrooms.
The timing of sealer application matters. Applying sealer before the surface is fully polished traps abrasive residue and reduces adhesion. Applying it too long after polishing allows the stone to absorb contaminants that the sealer then locks in. The professional standard is to apply sealer within 24 hours of completing the final polish.
Maintenance frequency depends on stone type and use. Granite countertops in a busy kitchen typically need resealing every 12–24 months. Marble floors in a residential lobby may need attention every 6–12 months. Stone flooring maintenance schedules should account for foot traffic, cleaning products used, and the type of sealer applied.
6. Comparing the different stone polishing techniques
Choosing between stone polishing techniques depends on your stone type, the condition of the surface, and the finish you want to achieve. The table below summarizes the four main methods across the criteria that matter most to homeowners and property managers.
| Method | Best stones | Effort level | Finish type | Best use case |
|---|---|---|---|---|
| Wet polishing | Marble, granite, quartzite | High (professional) | Mirror gloss to honed | Deep restoration, new installations |
| Chemical polishing | Marble, limestone, quartz | Low to medium | Enhanced gloss | Minor etch repair, maintenance |
| Mechanical grinding | All stone types | High (professional) | Matte to mirror | Full restoration, scratch removal |
| Barrier coatings | All polished stones | Low | Protective, no change | Post-polish protection, stain defense |
Wet polishing and mechanical grinding are best suited for deep restoration work where the surface has significant scratches, staining, or damage. These methods require professional equipment and are not practical as DIY stone polishing tips for most homeowners. Chemical polishing and barrier coatings, by contrast, are accessible maintenance tools that homeowners can apply between professional service visits.
For property managers overseeing multiple units or commercial spaces, the most cost-effective approach is a professional mechanical polish every few years combined with regular chemical maintenance and consistent sealing. This schedule preserves the surface between major restorations and extends the time between costly full treatments. You can learn more about polishing in stone care to build a maintenance plan suited to your specific surfaces.
Key takeaways
The best methods for stone polishing depend entirely on stone type, surface condition, and desired finish. Matching the method to the material is what separates a lasting result from a costly mistake.
| Point | Details |
|---|---|
| Match method to stone chemistry | Calcite-based stones need oxalic acid compounds; silicate stones need cerium oxide. |
| Never skip grit steps | Skipping grits leaves scratches that finer pads cannot remove, requiring a full restart. |
| Wet polishing outlasts dry | Wet pads last 3–5 times longer and produce superior finishes on natural stone. |
| Seal within 24 hours of polishing | Applying sealer promptly after polishing prevents contaminant absorption and maximizes adhesion. |
| Honed finishes suit high-traffic floors | Stopping at 400–800 grit produces slip resistance and hides wear better than mirror gloss. |
What I have learned after years of working with natural stone
The single most damaging assumption homeowners make is that all stone polishes the same way. It does not. Marble and granite are chemically and structurally different materials that require entirely different compounds, grit progressions, and finishing approaches. Treating them identically is the fastest way to create a surface problem that costs far more to fix than the original polish would have.
The second lesson is about heat. Most DIY failures I see come from too much pressure and too little water. Excessive pressure or speed can burn or discolor resin-filled engineered stones, and the damage is often irreversible without full resurfacing. Water is not optional in wet polishing. It is the mechanism that makes the process work safely.
Chemical polishing is genuinely underused by homeowners. A quality cerium oxide or oxalic acid compound applied correctly can restore reflectivity to a dull marble countertop without any mechanical equipment. That is a real, practical tool for maintaining your stone between professional visits, not a shortcut or a substitute for proper restoration.
My honest recommendation: invest in one professional mechanical polish done correctly, then maintain the surface with chemical compounds and a quality sealer. That combination will keep your stone looking premium for years without requiring repeated full restorations.
— High
Protect your stone investment with Highlinestonecare
Polishing your stone surfaces is only half the work. Without the right protection, even a perfectly polished marble countertop or floor will etch, stain, and dull within months. Highlinestonecare offers advanced stone restoration and polishing services for homeowners and property managers across New York City, combining professional mechanical polishing with premium sealing solutions. Their signature Opal Luxury Anti-Acid Sealer provides permanent protection against etching and staining from a single application, making it the most advanced barrier coating available for marble and calcite-based surfaces. Contact Highlinestonecare for a consultation and get a polishing and protection plan built for your specific stone.
FAQ
What is the best method for polishing marble at home?
Chemical polishing with oxalic acid compounds or marble polishing powder is the most accessible option for homeowners. Apply with a damp cloth for minor etches, but contact a professional for deeper scratches or full surface restoration.
How often should natural stone floors be professionally polished?
Most natural stone floors in residential settings need professional polishing every 2–5 years, depending on foot traffic and maintenance. Regular sealing and chemical maintenance between professional visits extends that interval significantly.
Can you skip grit steps to save time when polishing stone?
Skipping grit steps leaves coarse scratch patterns that finer pads cannot remove, requiring you to restart from the beginning. The time saved is always less than the time lost correcting the mistake.
What is the difference between honing and polishing stone?
Honing stops the grit sequence at 400–800 grit, producing a matte or satin finish. Polishing continues to 1,500–3,000 grit and beyond to achieve a reflective, mirror-gloss surface.
Do all stone types need a sealer after polishing?
Most natural stones benefit from sealing after polishing, but the sealer type varies. Marble and limestone require anti-acid or penetrating sealers to resist etching. Granite needs a penetrating impregnating sealer to block staining from oils and liquids.
Recommended
- The Role of Polishing in Stone Care for Homeowners
- Stone Polishing NYC | Countertop & Floor Polishing Services
- Stone Flooring Maintenance Tips for Homeowners
- Stone care terms explained: Expert guide for NYC homes